

I started with sketches. The design borrows a lot from
various knife designs that I like (including the Nimravus). I drew it 1:1 scale
so I could hold my hand to the paper to design the handle to fit me. I went
through a lot of iterations until it looked right. The final design has a 4”
handle and a 4” blade, very wide flat grind, a fairly blunt tip, and slight
concavity in the lower half of the blade. I was able to be pretty aggressive
with finger notches in the handle since I knew it would fit my hand and didn’t
need to be generic.
I wanted some parts to be recycled/repurposed materials,
but I couldn’t find anything with dimensions that would work for my blade, so I
bought 154CM steel. It will make a better knife in the end than a saw blade or
file anyway. I wanted it to be indestructible since I will use it for heavy
duty work like splitting logs, so I bought 0.125” thickness. I decided the
handle scales at least should be recycled, and I found an old Pelican case to
cut material from. I also used the stainless steel pivot pins as my handle
pins.
When my steel arrived, I had to cut it to length since I
bought it long enough for two. After wearing out two hacksaw blades trying to
cut it and resorting to scoring and snapping, I figured the steel must have
arrived already hardened. I was too excited to take the time to make a forge
from concrete, so I just set up the outlet of my shop vac to blow into the
bottom of my charcoal grill to do heat treat. It worked well enough to get the
steel to critical temperature, then I let it air cool to soften.

I traced my design onto the blank and started roughing
out the outline. I was very glad to have my angle grinder with a cutoff wheel
for this, as it was still tough to cut with the hacksaw after softening. I
either didn’t soften it enough, or 1/8th is just really thick, or
both. After roughing, I spent a lot of time at the bench grinder setting the
outline. After it matched my sketch, I spent a lot of time at this stage
refining the handle profile since I could actually hold it. I also made slight
tweaks to the blade edge shape.


I built a filing jig using a design I saw in a few places online. It holds a flat file at an exact angle through the whole process so you can make a precise grind. I didn’t bother to take measurements for the angle, I just played with it until it looked right. After the first filing session, I could tell it was going to take way too long to remove all the material by hand. To speed it up I went back to the bench grinder and very carefully did a rough grind to get a big portion of the material off quickly.

Even after that, the filing took forever. After the first
couple hours I was getting worn out and had to stop. Later that night I went
out and did a 20-minute filing session about once an hour for 3 or 4 cycles,
and then the next day I finished the filing in one 2-hour session. Everything I
read online says it should have taken less time, so I probably didn’t do the
first heat treatment correctly. Towards the end I scribed some center lines
along the edge so I could make corrections when I started grinding unevenly.
Once the leading edge was down to 0.025” I decided the grind was done.
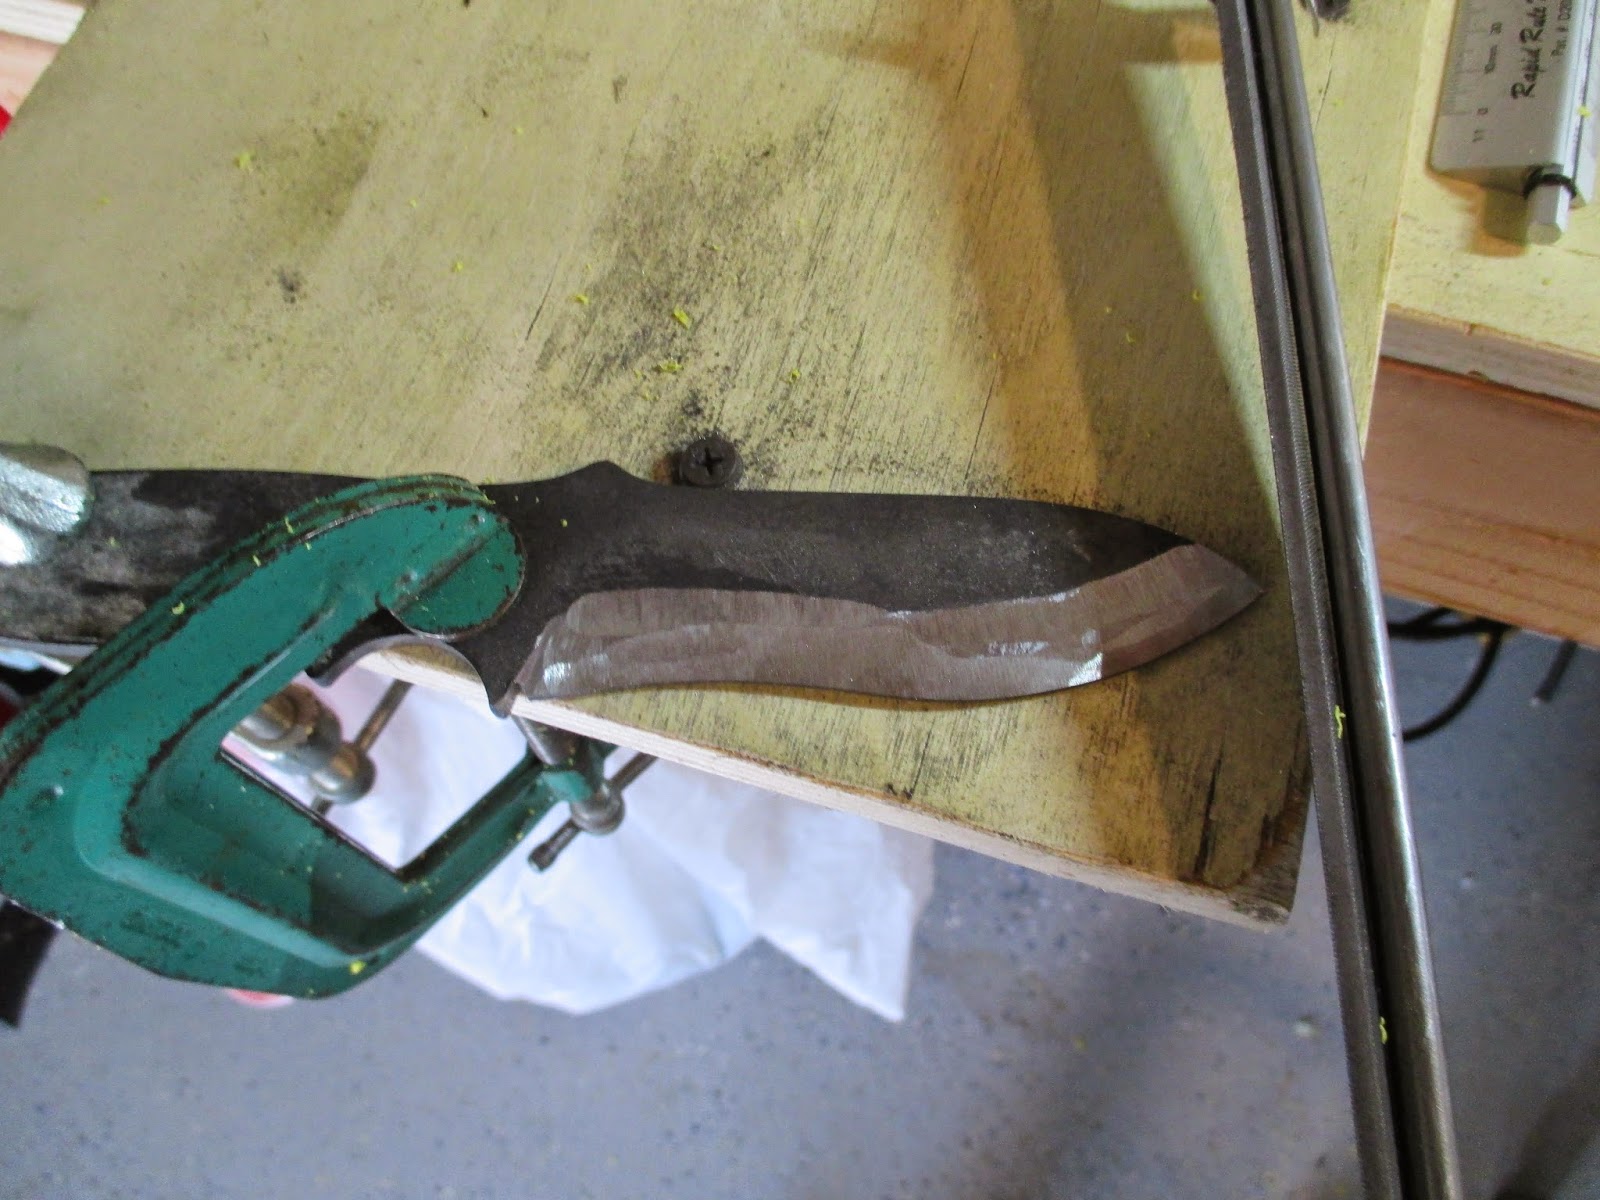


After that I set the edge using the same filing jig set
to a steeper angle (eyeballed it again). I was really nervous about going too
far and ruining the edge profile, so I left more than I probably should have
before the final heat treat. It wasn’t really an issue though, since it was
such a small amount of material to remove after hardening. The last step before
heat treat was to drill holes for the handle pins. At this step too I was
reminded that I didn’t soften it enough when I broke a drill bit. I think the
fact that I was able to drill at all means it was softened to some degree,
though.'

For the hardening heat treatment I set up the grill forge
again, and it was easier to work this time since I only needed to get half of
the piece to critical temperature. I quenched the blade in a soda can full of
used motor oil. The motor oil left the surface darkly stained, even after
thorough cleaning. I was disappointed since I had decided to do the surface
finishing after heat treat, but I loved the look of the dark coating. I sanded
it slightly and then decided to just leave it as-is. You can still see file
marks but it feels completely smooth, plus it’s probably better if I don’t need
to worry about scratching it up when I use it. After heat treat I did the
tempering step in the oven at 400°.
I used a hand saw to rough cut the handle scales to
shape, then drilled the holes in them. The holes were drilled slightly
undersized in both the steel and the scales, so everything held together pretty
well even before glue. I applied epoxy to both sides and then clamped the whole
thing together. After the epoxy had partially set, I cut off the excess on the
pins and ground them flush, then put the whole thing in the vise to apply more
even pressure and left it for a few hours.


I was really wishing I had a belt sander to do handle
shaping; I ended up doing all the rough shaping with a rasp and the sanding drum
on my Dremel. I did the finer detail for finger grooves with a half-round file,
and then finished everything with sandpaper.


I had to go back to the filing jig to set the final edge,
which wasn’t too bad. After that, I used a combination of diamond whetstone and
carbide sharpener to get a rough edge before moving on to ceramic sticks. It
took an edge nicely, we’ll see how well it holds up with use. Next up is making
a kydex sheath, and I’m thinking about trying some dye on the handle since the
color isn’t exactly what I wanted.
This comment has been removed by a blog administrator.
ReplyDelete