Wednesday, January 1, 2014

Roku remote mod


We recently got a Roku 3 player, which is awesome. Just a few days into using it, though, I got fed up with having to use two separate remotes for the player and the TV. Before, we could use just one since the cable box remote can be programmed to operate the TV also. The Roku remote can't do this, though, primarily because its connection to the box is RF instead of IR. I decided to modify the controller to send IR commands to the TV so I could use just the one remote while watching stuff on the Roku.


The first step was to decode the protocol used by my LG TV. By watching IR on the scope, I could see that it was modulated at 38kHz, and sends a 4-byte packet for each command. Each packet starts with a fairly long start pulse, followed by 33 pulses 580us long. The 1/0 keying is encoded in the space time between pulses, either 520uS (which I arbitrarily called 0) or 1.6ms (1). This is why there are 33 pulses instead of 32, because the final space has to be framed by a final pulse. I recorded the waveforms for four commands (power, input, volume up, volume down) and noticed that most of the bits are always the same. The only ones that change are the high nybbles of the 3rd and 4th bytes, so when I wrote my transmit function I have it just take in a single byte and split it into those two parts of the transmission. There's also a signal that tells the TV to repeat the last command, which is just a start pulse and a single bit pulse. The remote sends these repeat commands any time a button is held down to avoid repeating the entire packet (saving power).


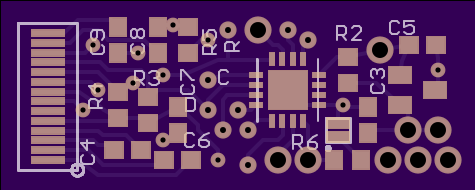
I wrote my application for the PIC12F617, which is the perfect size for 4 switch inputs and a single IR output. It is also well-suited because it has a PWM output, which I used to generate the 38kHz carrier signal. The PIC waits in sleep until a button is pressed, then sends the command out, and then sends the repeat command if the button is held down, and that's it. I measured the sleep current and it was so low that my meter didn't register anything at all (meaning it is less than 0.05 microamps). Here's my protoboard test setup:


I then opened the Roku remote to see how much room there was inside to add hardware. It is a very well-designed product. Luckily, up front there's a lot of room under the board.


The remote has a feature where you can plug headphones into it and listen to stuff silently, so there are already volume switches. I didn't expect to use this feature much, so I replaced those switches on the PCB with my own and hijacked the external buttons to send volume commands to the TV instead. On the opposide side I added two momentary switches by drilling through the case and epoxying the switches inside. I put the IR LED into a black plastic tube to make the installation neater since it would be recessed into a curved surface, and epoxied it in place.


The PIC sits down at the bottom, and taps power directly from the battery connections on the stock PCB.


In the end it came out very well, although driving the LED directly from the PIC's I/O may have been a mistake because it needs to be very precisely aimed for the TV to receive it. This could also be a carrier frequency issue, though, as the PIC's internal oscillator is not extremely accurate. Here's the code

LED rings


I recently made a pair of LED-lit rings for me and my wife to wear to a party. Hers is built on a costume-jewelry ring with a big clear gem. Two small RGB LEDs light it from underneath, driven directly from a PIC16F1824. The software slowly fades through the whole color spectrum, and a small momentary switch on the side can pause it on any color in the range and stay there. It also has a low-power standby mode. The whole thing is powered by an 80mAh lipo cell on the bottom of the band.


My ring is built into a 3D-printed shell I designed.


It has 7 of the same RGB LEDs and runs a ported modified version of the code for my RGB glasses. There's a small momentary switch to change modes, and it can run any mode the glasses can except those that use motion or sound input. This ring runs from a similar tiny lipo cell, but I wore it on my wrist with a wire out to the ring.


Both of these were exercises in ridiculously small wiring--I had to use 34AWG to connect to the QFN microcontroller. My motivation for these was in part just to test how small I could successfully solder. Here's the code for hers and his

Interactive Jack-O-Lantern


Every Halloween there's a Jack-O-Lantern contest at work, with exclusively LED-lit pumpkins. My entry this year was this interactive pumpkin. It has a “mood” which is portrayed by eyebrow position and illumination color (which fades gradually from green (happy) to red (angry)). The mood changes depending on how close a person is to the pumpkin. From afar he looks happy, but gradually gets scarier as you approach him. In addition to changing color, the light at all times is modulated to simulate the flicker of a candle.

 The illumination is provided by an XML-RGBW, driven from LM7135regulators. Distance measurement is accomplished with an ultrasonicrangefinder in the mouth of the pumpkin. The eyebrows are operated by a single small hobby servo, through linkages made from music wire.


Getting those linkages to work out was not trivial as I was trying to drive the eyebrows in opposite directions from the same servo. The linkages are visible in this picture of the inside:


As always, this was a rush job right before the contest deadline, but I just barely got it working in time, and the kids that came to our house later that night appreciated it too.

Here's the code

RGB Glasses update


I recently made a few updates to my RGB glasses. Also, we discovered that they look fantastic on dogs. The big change is to the bracelet: after my new uNRFv2 radio boards came in, I wanted to make a better control bracelet with one. The new bracelet is built on a 3D-printed plastic piece that holds the uNRFv2, the battery, the accelerometer, and 3 momentary switches. (in this photo some of the hardware is not yet installed)

 The bracelet performs the same functions as the previous one, but looks better and is less prone to damage because the wiring is protected. It also has a low-power sleep mode instead of a battery disconnect to shut it down. I also wrote an update for the glasses which makes a few mode changes, and adds a momentary switch on the glasses that allows mode changes, which means the glasses can be used without the bracelet. The switch also allows the radio channel to be changed in case of interference. The bracelet software has a provision to change the channel to match. The most notable mode update to the glasses software is lightning mode:


Here's the code for the bracelet and the glasses

OLED Interface Board


While preparing for my Veloster proximity sensor project, I found these great OLED displays on eBay. They are monochrome 128x32, self-illuminated (OLED), graphical displays with a convenient serial I2C-ish interface and only cost about $4. The only downside is they have a 14-pin flex connector and require some external passives, so connecting to them is a challenge. The first one I used, I hand-soldered 30AWG wire to the flex connector, which was not easy (wiring visible on the right in this picture). 


That prompted me to create an interface board for future projects with these displays. The board has a footprint that the flex connector can solder to directly, all the required passives to use the display in internal charge pump mode, a 3v3 regulator, and a PIC16F1824 in QFN to operate it. In some applications the PIC can operate the entire application, in others it can receive data over serial and display it, and some cases I may just use the board as a breakout for the OLED with no PIC populated. 


The entire board is about the same size as the display, so the flex connector can fold over and sandwich the two together into a very small package. After getting the boards working, I wrote a piece of code that implements and variety of methods of displaying data, including bar graphs, moving time plots, and multiple digit sizes. The framework code also has a 5x8 pixel font included. At this point, the only real use I've put these to was to test out a new display layout for my Veloster proximity sensors before installing the update in the car. Here's the framework and the display test as an example. This board is available open-source on OSHPark under my profile here